Advanced Node Settings
Advanced Node settings allow you to further fine-tune the behavior of a Node. You can hide technical Nodes by default or mark Nodes as base Assumptions.
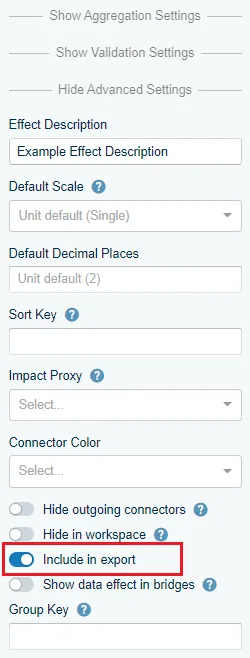
The Advanced Settings section of the Node Editor holds these controls, in this order:
| Setting | What it does |
|---|---|
| Effect Description | Free text shown as the node’s effect description. |
| Default scale | The scale a chart uses for this node when it has no scale of its own. |
| Default decimal places | The number of decimals a chart uses for this node when it has none of its own. |
| Sort key | Overrides where the node sorts, instead of by name. See Sort Key Settings in Nodes. |
| Connector Color | The color of the node’s connectors, see below. |
| Hide outgoing connectors / Hide incoming connectors | Hide connectors on one side, see below. |
| Hide in workspace | Keep the node out of chart creation and tree charts, see below. |
| Include in export | Include the node and its data in exports, see below. |
| Operation per baseline | Lets the node carry a different formula per baseline. See Working with different model baselines. |
| Show data effect in bridges | Break this node’s own contribution out in a bridge. See Data Effects Display in Bridge. |
| Group key | Groups this node with others under one bar in a bridge’s data effects. See Data Effects Display in Bridge. |
The node’s ID is shown at the bottom of the section. The sections below cover the settings that need more than a line.
Hide in Workspace
Nodes that are marked as “hide in workspace” will be hidden by default. This means that they will not be shown when creating new Charts or as part of Model Tree Charts. You can override this behavior per Workspace using the setting “Hide technical Nodes”.
Connector display and color
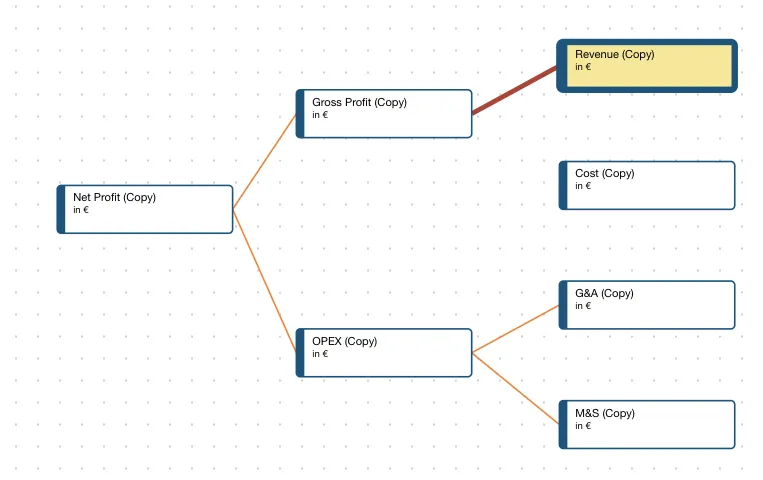
You can hide outgoing and incoming Connectors or color them in a different color (see picture with Connectors in orange). Hidden Connectors will still be shown when the Node is selected (see picture with hidden Connectors for the top right two Nodes). This setting won’t have any effect on the Tree Chart in the Workspace.
Including nodes in an export
Via the node editor, nodes can be marked to be included in exports.
When activating this function, the node and its data will automatically be included in the exports generated within this project.
This is also helpful when creating templates, as there is an extra filter function for nodes marked for export.