Sharing Scenarios
When you share a Scenario, a snapshot of it is created that includes all of its current Assumptions and their data. This will become available to all users.
Subsequent changes to the original Scenario will not automatically refresh the shared Scenario, so you have to share it again if you want to update the shared version and make these new changes available to other users.
Sharing a scenario that has Line-Item Variants active, will only include the active Variants.
Sharing scenarios
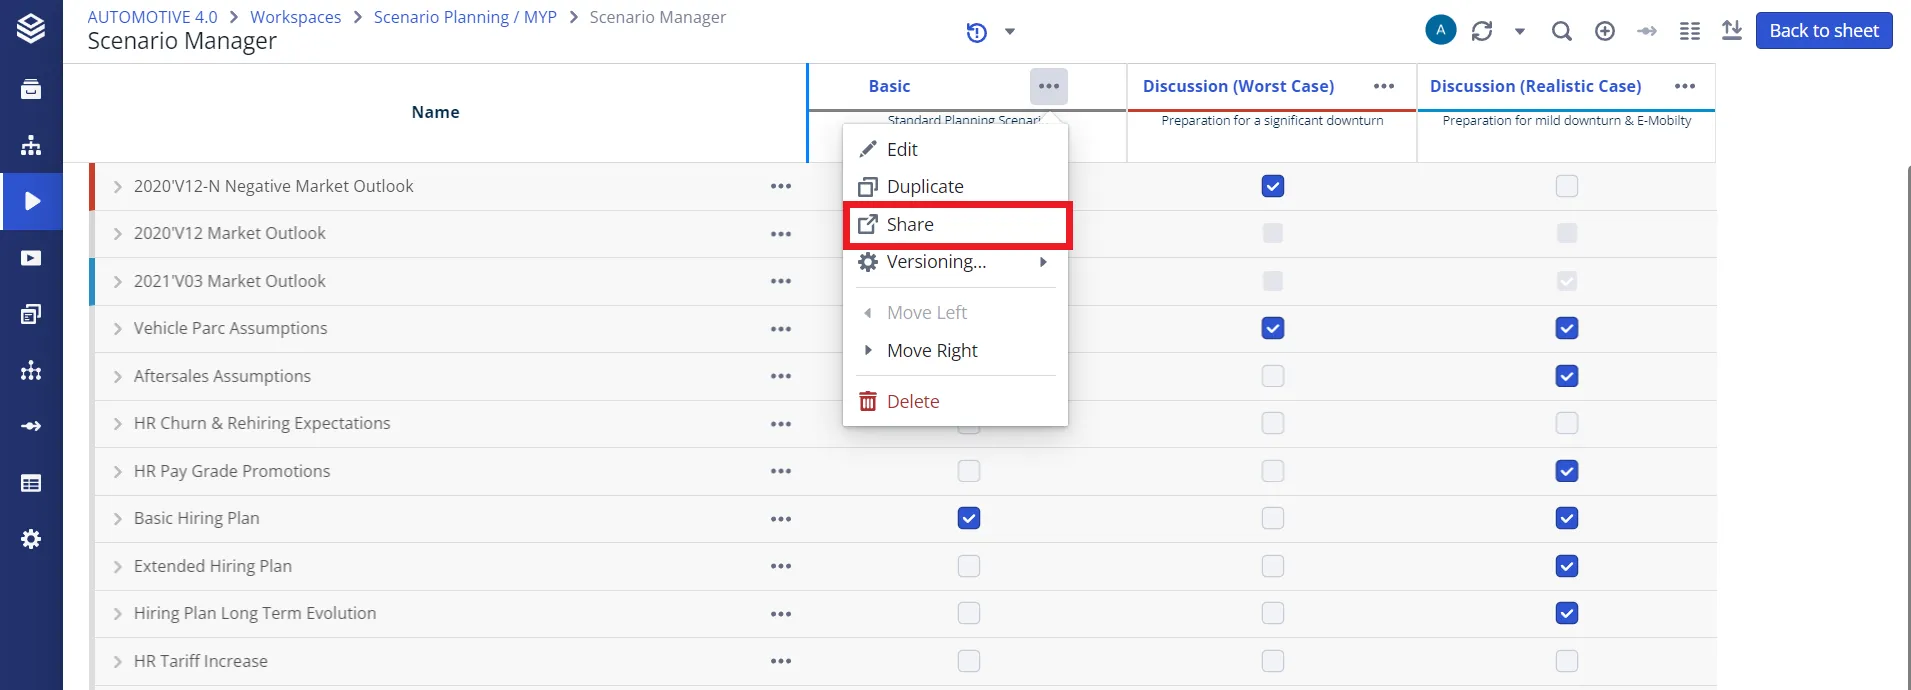
To share a Scenario, open a Simulation Workspace and navigate to the first tab in the Workspace. You should see the Scenario Manager with your existing Scenarios and Assumptions. If you click on the button next to the Scenario you want to share, you will see the Context menu for the Scenario. Click on the entry “share” to open the “share Scenario” dialog.
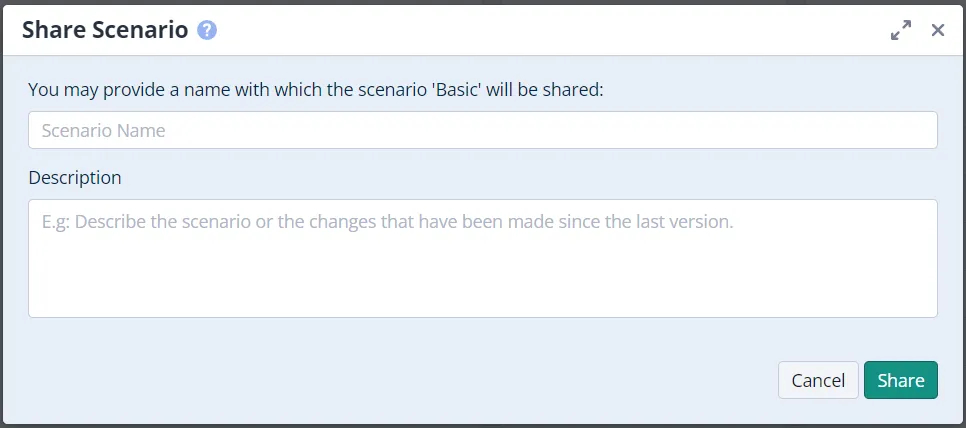
A shared Scenario is created with the original name and a version to help you keep track of changes. You will see the generated name of the shared Scenario in the dialog. You can also add comments to the shared version here that will be visible to other users.
Building scenarios based on other scenarios
Scenarios can logically reference other Scenarios by a) being based on another workspace scenario or model scenario or by b) including another Scenario for Simulations as an Assumption. In both cases, the technical relationship is the same, meaning that all assumptions that are in A are also active in B.
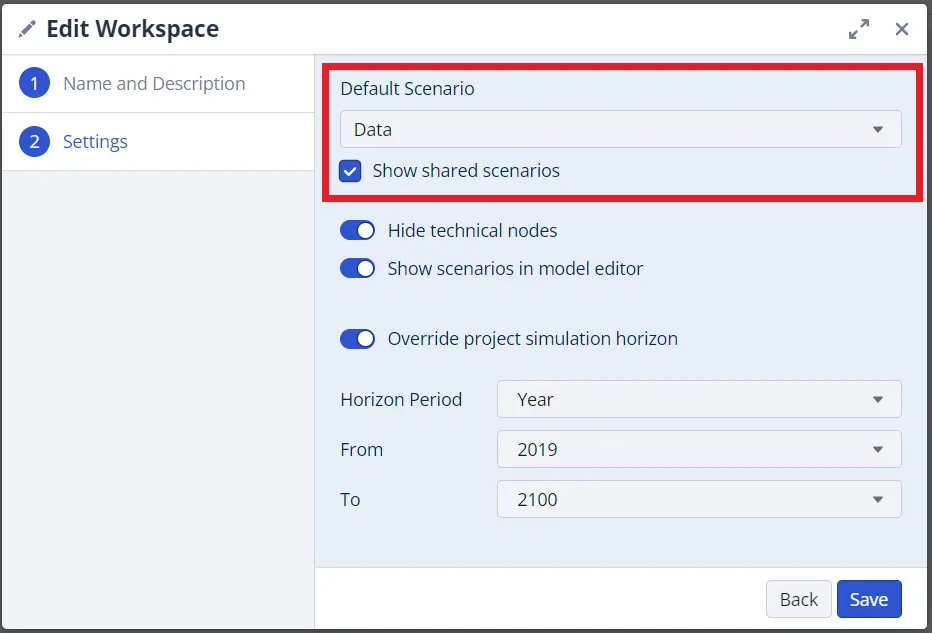
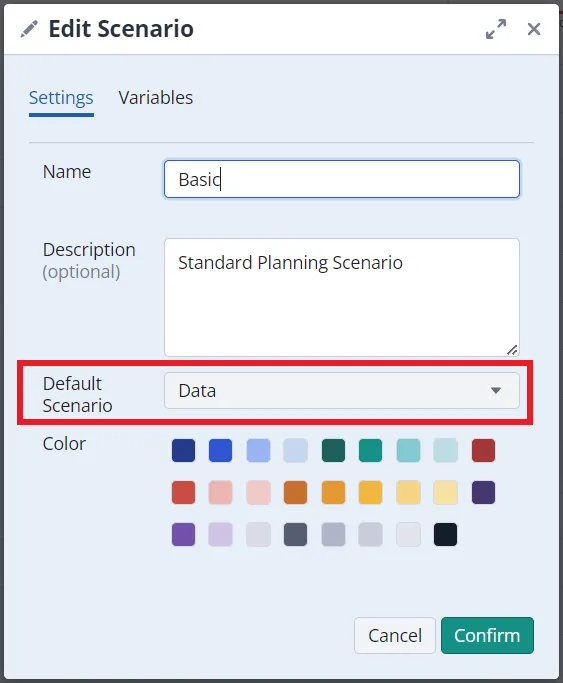
You can configure the base of a scenario when you create or edit the scenario in the Scenario Manager using a combobox. This combobox should list all your created scenarios and the scenarios that have been shared with you. By default, the scenario of the workspace is selected. You can configure ‘chains’ of scenarios building on top of each other. A chain always has to end with a scenario that is based on a model scenario.
Using a shared scenario as assumption
You can add a shared scenario as an assumption to your Scenario Manager with the ”+ assumption” button in the upper right corner of the Scenario Manager. The arrow on the right side inside the button will open the dropdown menu.
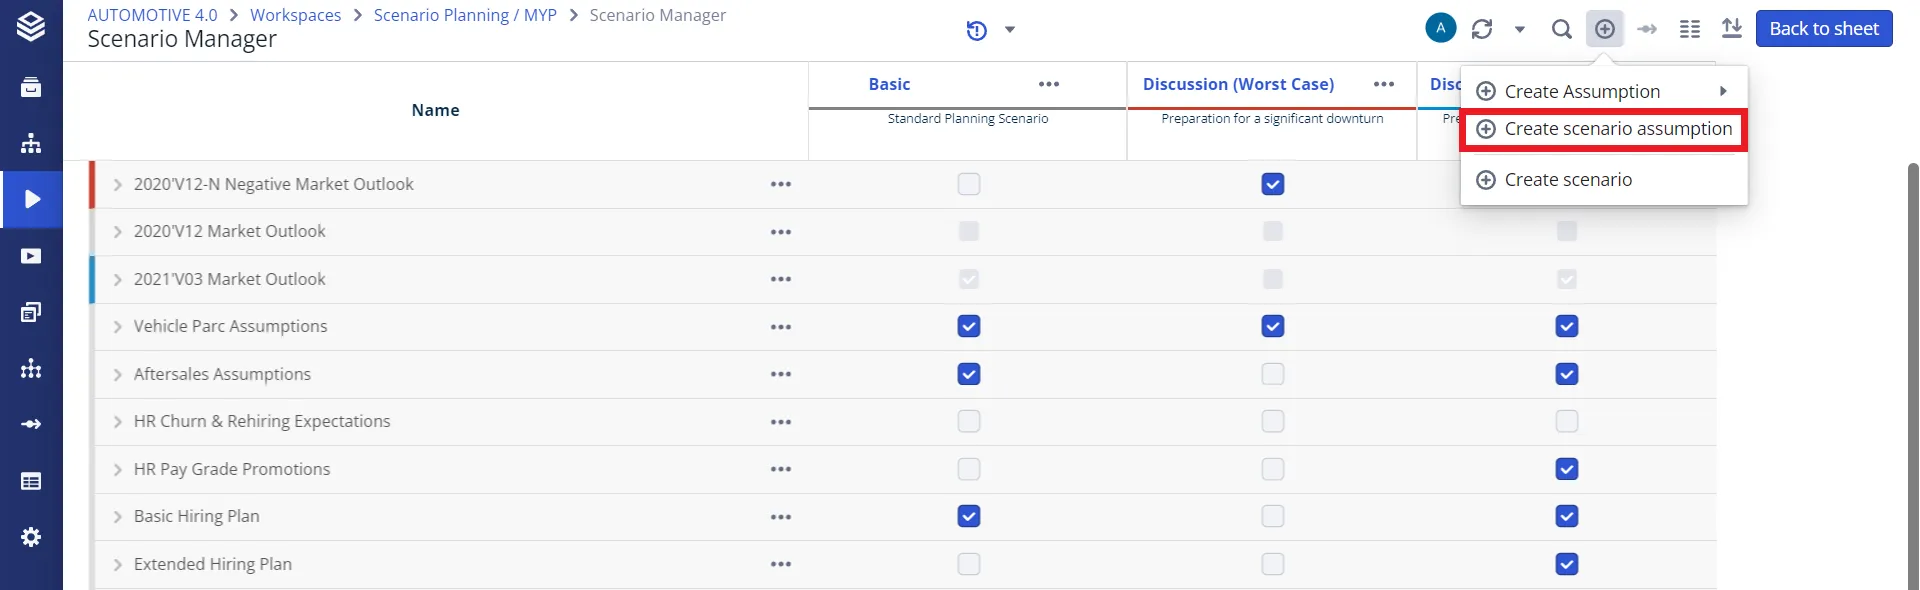
When you click on the menu entry for scenario assumptions, you are presented with a list of scenarios that you have shared or that have been shared for you.
Note, that those scenarios that you have already added as scenario assumptions will not show in the dialog.
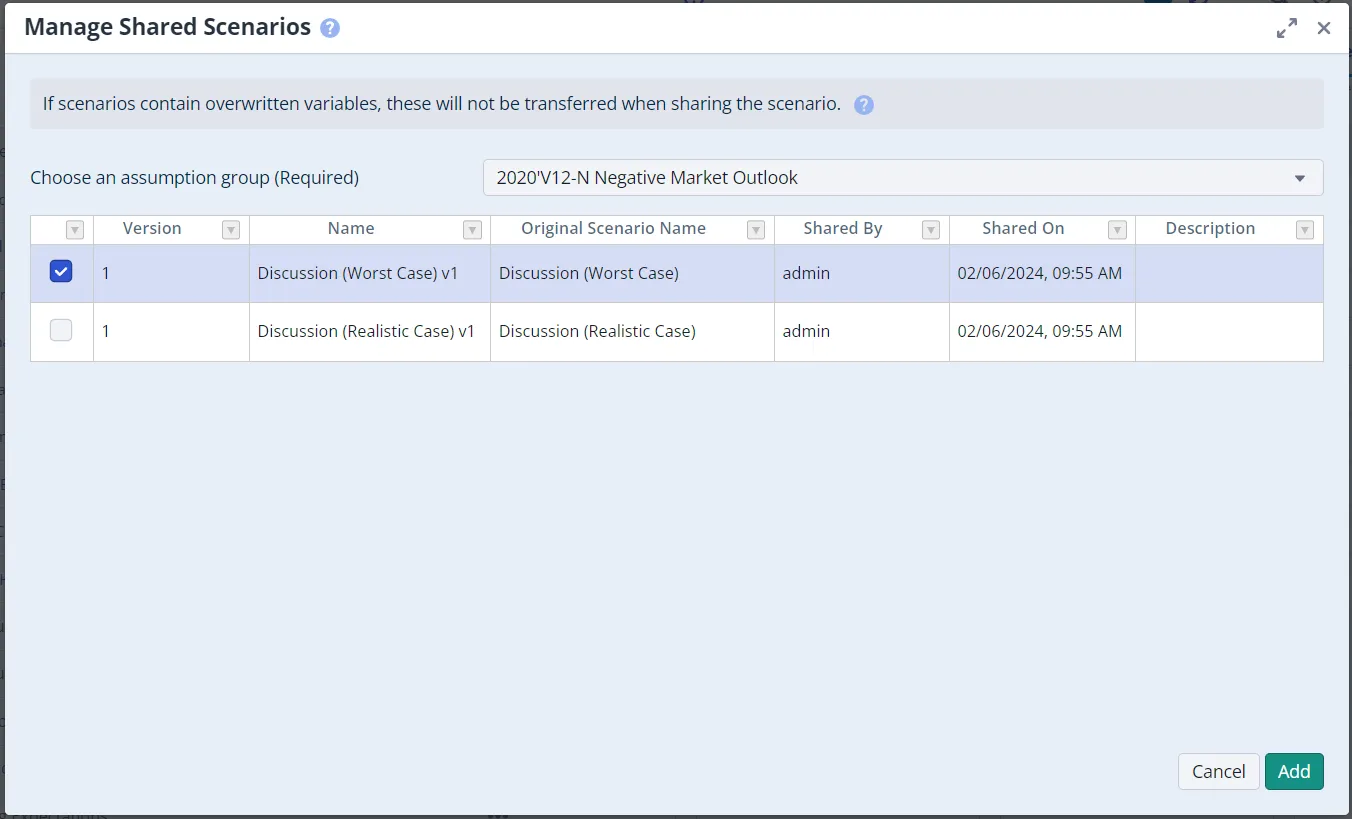
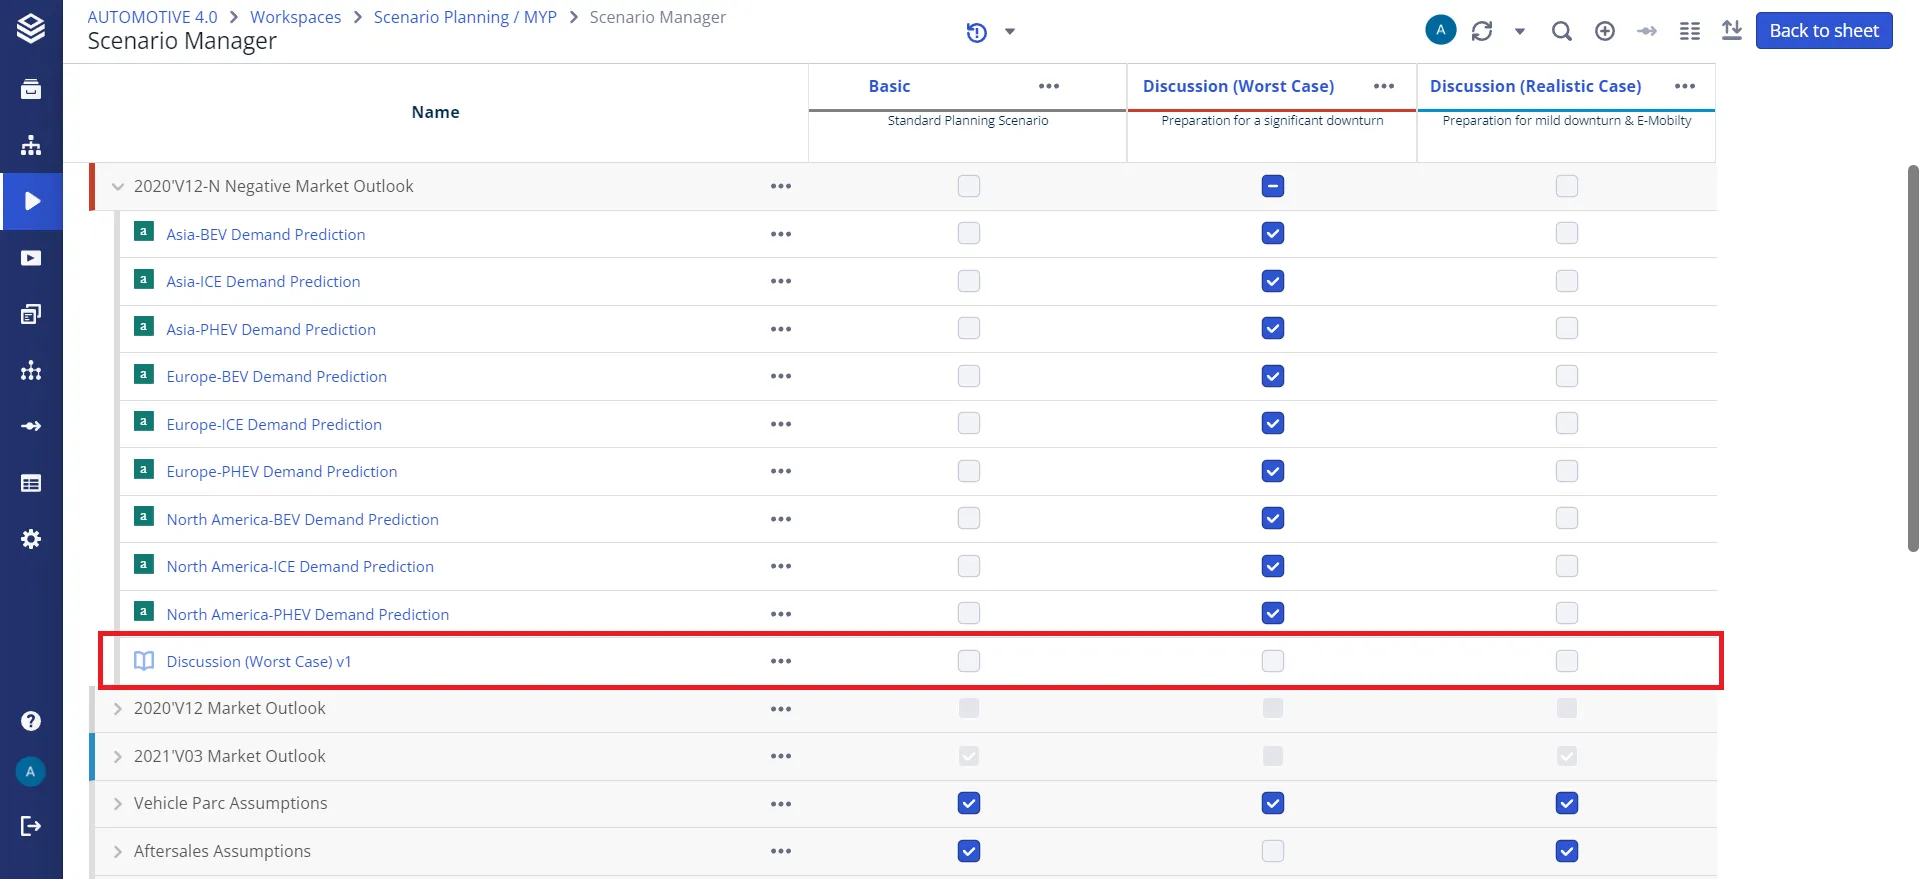
Select the scenarios that you want to add as assumptions and and click on the “Add” button. The scenario assumptions will show up as rows in the Scenario Manager and you can activate them in your other scenarios to use the assumptions that are active in the scenario associated with the scenario assumption.
Manage shared scenarios
You can unshare any scenario you have shared if it is not currently used and view all scenarios that have been shared with you. To manage the scenarios that have been shared with you and that you have shared, go to the list of workspaces. In the upper right corner, a “Manage Scenarios” button is available next to the “Add” button. Click on the “Manage Scenarios” button to open the shared Scenario Manager.
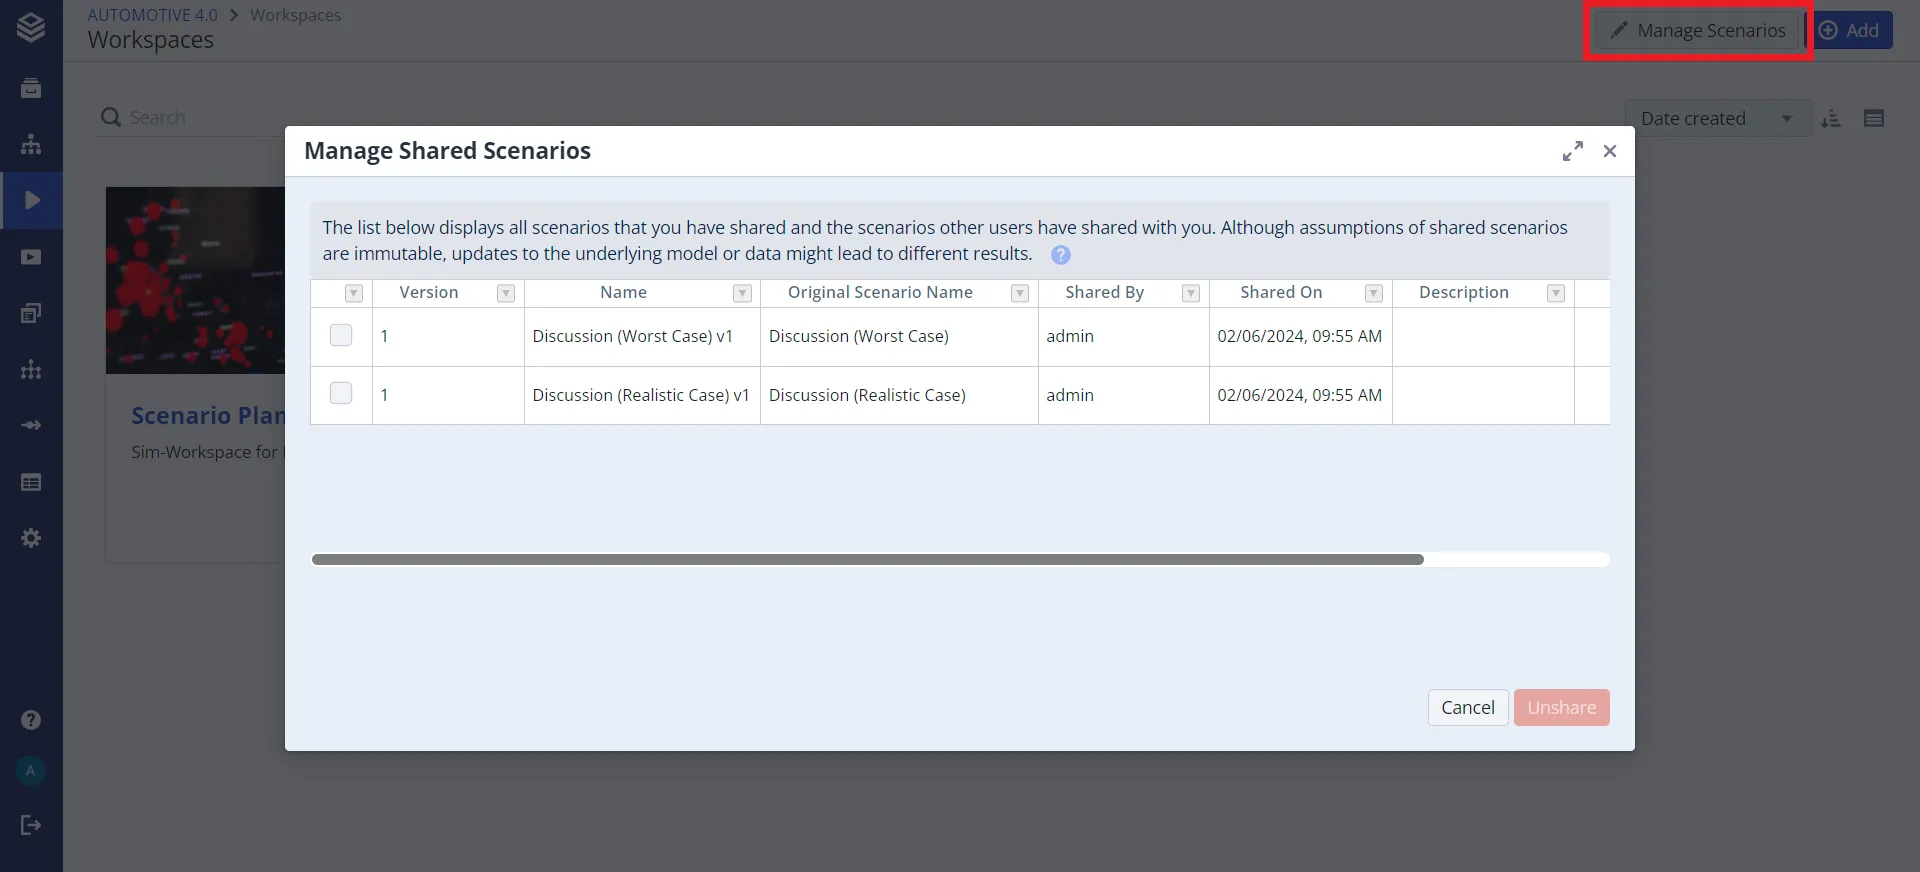
The manager dialog displays all the scenarios that you have shared by default. To see the scenarios others have shared with you, use the “Show all shared versions” link at the bottom. Select the scenarios you want to unshare and click the “Unshare” button to confirm your selection. The “Used by” column has detailed information which workspace and which scenario is currently using your shared scenario.
Whether a shared scenario can be unshared depends on the scenario and on your own user:
- The scenario must not be in use. A scenario that is still used in any workspace cannot be unshared, whoever you are.
- You can unshare the scenarios you shared yourself.
- Project admins and global admins can unshare any scenario, including ones other users shared.
- Analyst users cannot unshare at all, not even a scenario they shared themselves.
The selection also has to stay inside one project. Selecting shared scenarios from two different projects rejects the whole request with “Cannot unshare from multiple projects at the same time.”
Deleting all shared scenarios (admin only)
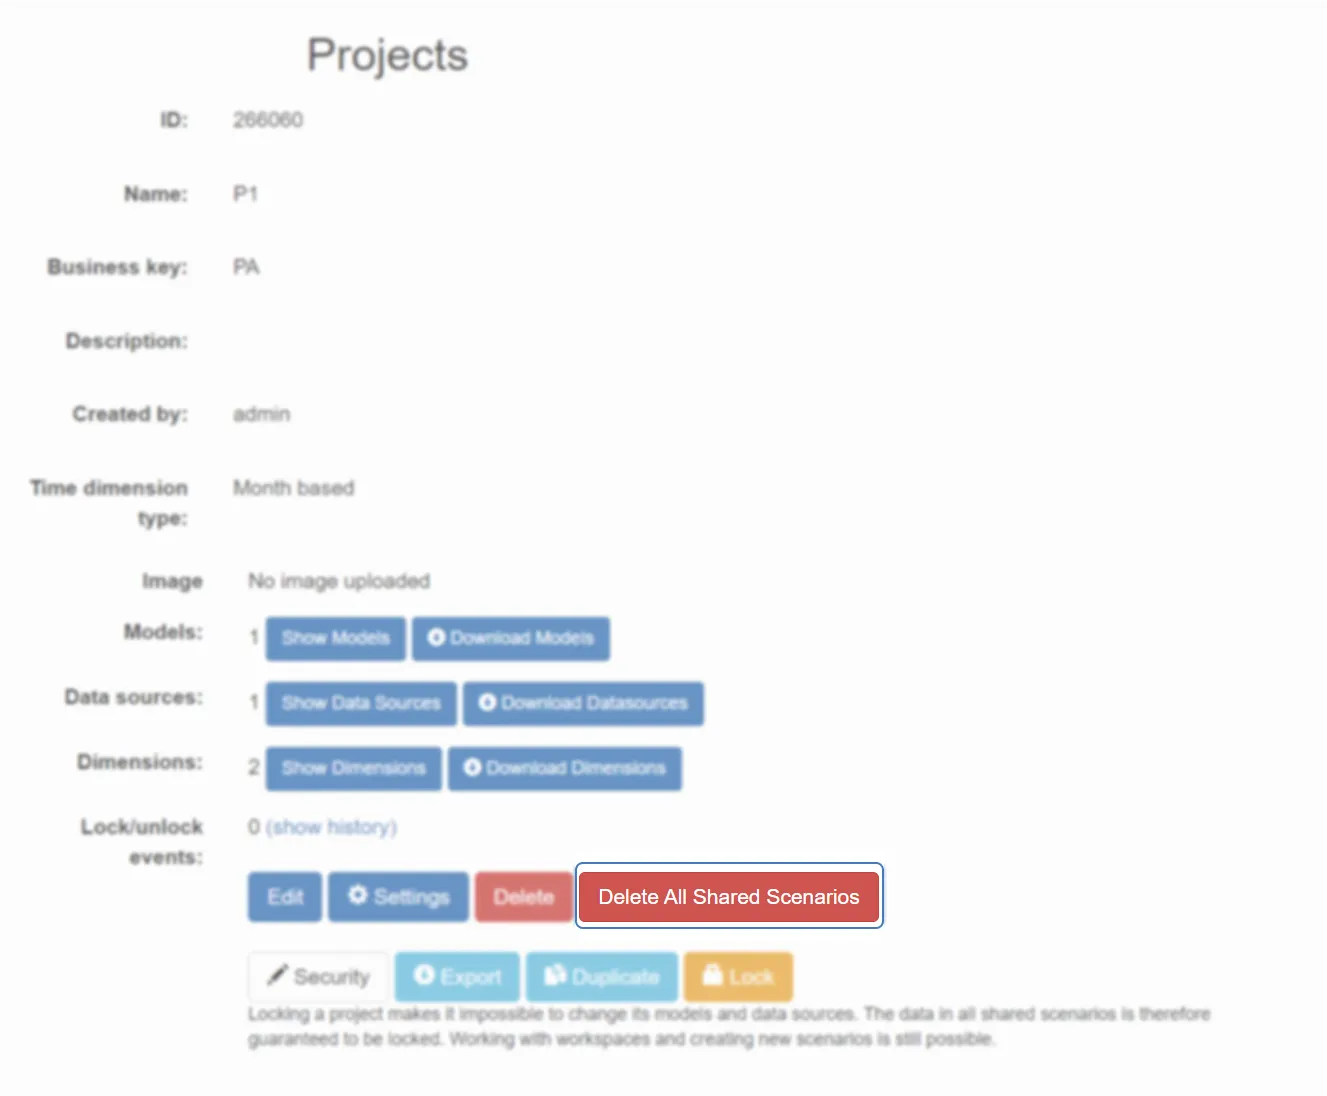
In some cases, such as after duplicating a project, it may be beneficial to delete all shared scenarios in a project. To do this, admins can navigate to the Valsight Settings page, click on ‘Projects’ and navigate to the desired project with the shared scenarios. To delete all shared scenarios, click on the ‘Delete all shared scenarios’ button next to the ‘Delete’ button.
This purges the whole project’s version history, not only its shared scenarios
Despite the button’s name, the action is a project-wide versioning purge. It removes every saved version of every assumption and scenario in the project, including versions in workspaces that were never shared, and it resets the version counters of the workspaces that remain. The confirmation dialog lists what it does:
- Delete all versions of assumptions and scenarios in workspaces
- Delete all shared scenarios and scenario assumptions in workspaces
- Remove scenario data from workflow submissions
- Remove parent scenarios from scenarios
- Reset workspace default scenarios
This is an Admin only function and is irreversible.
Two things to know before you run it:
- The project must not be locked. On a locked project the action is refused with “The project is locked. Unlock it to make changes.” and nothing is deleted. Unlock the project first, and consider locking it again afterwards.
- Workflow history loses its scenario links. Workflow submissions and timeline entries that referenced a shared scenario keep their entries, but the reference to the scenario is cleared.
The purge is written to the security audit log. Please ensure that you are aware of all shared scenarios by checking the ‘Manage Shared Scenarios’ overview as shown above.