Images
An image tile places a picture on a worksheet, next to your charts. Use it for a logo, a diagram, or anything else that gives a sheet context without being data.
What it is
An image tile starts empty. You add it like any other tile, then upload a picture into it. The tile holds one image, and it can be moved and resized like a chart.
When to use it
- You want a logo or a title graphic on the sheet you present from.
- You want a diagram that explains something the charts cannot, such as a process or an org structure.
- You want a picture as a visual anchor on a dashboard.
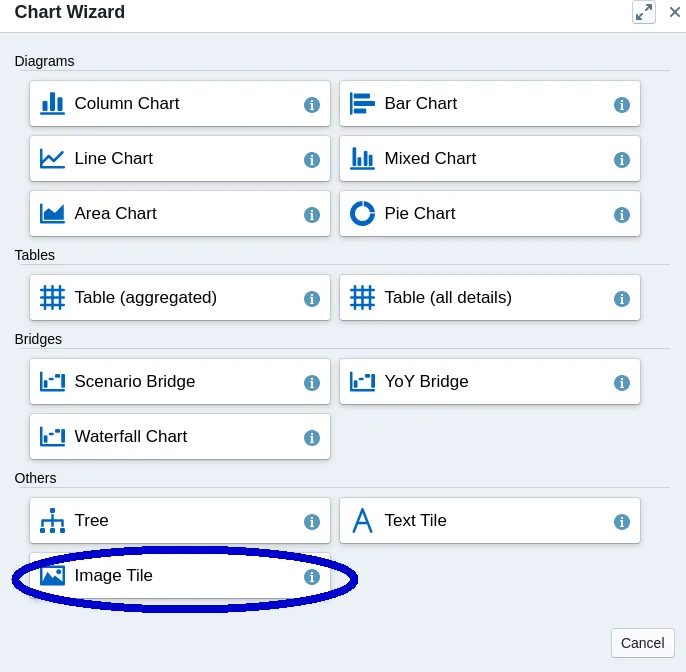
For text rather than a picture, use a text tile instead. Both are listed under Others in the chart type selection. See Chart Types.
Configuration
- Open the sheet you want the image on.
- Add a chart and find the Image option under the Others group of the selection.
- The selection closes and an empty tile appears on the sheet.
- Click Upload Image in the middle of the tile.
- Choose a file from your computer.

| Requirement | Value |
|---|---|
| Formats | .png, .jpg, .jpeg |
| Color space | RGB. CMYK is not supported. |
| Maximum file size | 1 MB |
| Resizing | Images wider than 3840px (4K) are scaled down to that width |
Good to know
- A CMYK file will not upload, even in a supported format. Convert it to RGB first. This catches print-ready logos most often.
- 1 MB is the hard limit, so a large photograph usually needs compressing before it will upload.
- GIF is not supported. The file picker offers PNG, JPG and JPEG only. Convert an animated GIF to a still PNG first.
- Images are not data. Nothing in an image tile updates when a scenario or the model changes.
Related
- Chart Types: the other tiles you can place on a worksheet.
- Using the Presentation Mode: sharing a finished sheet as a static snapshot.