Linked levels
Levels in your dimension can be extended with information by adding labels.
These labels are levels with extended information that are linked to the existing levels.
With this, the extended information is added to all the data in your project and can be visualized in the workspace.
Step-by-step approach
Valsight allows you to add/remove labels to desired levels of a dimension.
These labels can be called ‘linked levels’.
In the following, linked levels or linked attributes will be referred to as “labels”.
Given the case that you have a hierarchy/dimension (e.g. ‘Products’) with several levels, e.g.
Dimension: Products | Levels | |||
|---|---|---|---|---|
Product Family | Product Line | |||
Level Values | A | |||
A12 | ||||
A13 | ||||
B | ||||
B12 | ||||
B13 | ||||
If you realize during your process that you want to add other information, e.g. to a ‘Productline’ value, you can add this as a label to the level.
The first step is to create a new dimension, containing the missing information.
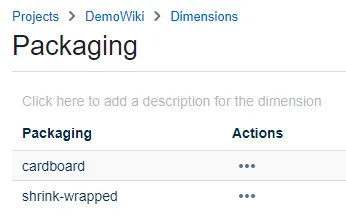
You can link the missing information to a certain level (e.g. ‘Productfamily’) by linking it as a level. Therefore choose ‘Configure Hierarchie’ in the dimension tab.

Let’s say you want to expand the ‘Productfamily’ by the information of packaging, e.g. Product A to cardboard.
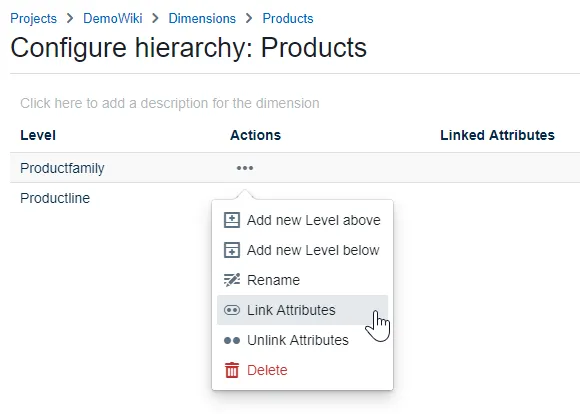
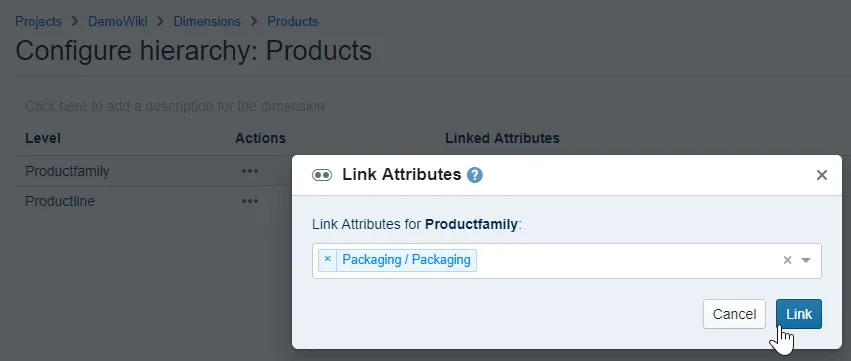
Now the level ‘Productfamily’ is linked to the desired label (to Packaging).
But in our case both level values A and B are now linked to the label cardboard, because it’s always referenced first.
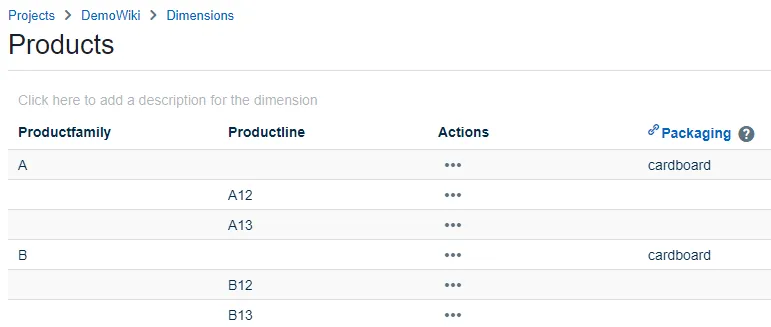
This means: to expand a certain level value by a certain information, you need to have the same input information available for all other level values.
To add the remaining information choose ‘Download Excel’ and for our example the following excel appears.
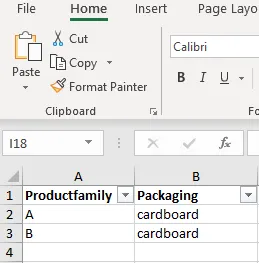
Now you type in the matching information for the other level values.
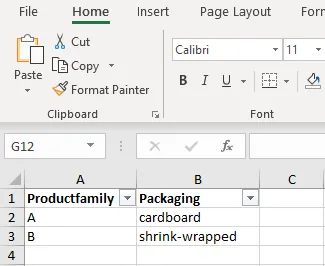
Afterwards you do ‘Upload Excel’ and import the changed excel sheet.

Now you extended a level of a dimension successfully. Your additional information is added to all the data in your project containing this level.
Performance improvements
Overview
When running calculations with labels included, it might cause performance issues on the user side.
To avoid these issues, users can exclude labels from calculations. Your numbers do not change. A label is derived from the level it is attached to, so it never holds information the level itself does not already carry, and line-item data is stored against the underlying level either way. What you gain is speed.
This is not a display setting, so change it deliberately. Excluding or including a label rewrites every line-item on that level and on the finer levels of the same dimension, following any chained labels, and clears the project’s calculated results so they are worked out again. Expect the project to recalculate afterwards, and avoid toggling it during a presentation.
Step-by-step approach
To include or exclude labels from the calculations:
- Go to ‘Configure Hierarchy’ in the initial dimension.
- Use the three-dot menu of the respective level.
- Click on ‘Edit Attributes’.
- Use the switch button to either include or exclude labels in the calculation.
Per default, labels are not included in calculations.
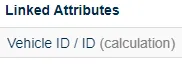
Labels used in calculations are also marked with a ‘(calculations)’ in the ‘label’ column.